ACEDBユーザーガイド日本語版クイックリファレンスβ版(Ver.0.8)
1997.7.20.
NEC基礎研究所 佐野 亨
(sano@exp.CL.nec.co.jp,
http://www.cbi.or.jp/~sano/)
*前書き
これはACEDB(Ver.4.5)を利用するための資料で、インターネット経由でご覧戴くことができるフリードキュメントです。ただし著作権は日本電気株式会社が有しており、放棄するものではございませんのでご注意ください。また本文書を利用する事によって発生するいかなる損害をも保証するものではありません。ご自分の責任でご活用ください。ソフト自体もまだまだバグが多く動作不安定なメニューがあり、ソフトウェアの作者たちも何らの保証をしていないので注意してください。
これはユーザガイドVer.1.3に対する補足資料です。細かいところはユーザガイドをご覧下さい。
最近は各種ドキュメントが充実してきていますので、さらに詳細を知りたい方はACEDBドキュメントサーバーをご利用下さい。ACEDBと線虫関係のWWWサイトへは著者のWWWサーバ上にある「虫の集い」のホームページ(
http://www.cbi.or.jp/~sano/wormjp/)から辿ることができますのでご活用下さい。
ACEDBは「A Caenorhabditis elegans Database」の頭文字であり、Richard Durbin博士(英サンガーセンター)およびJean Thierry-Mieg博士(仏CNRS)により1990年頃から開発されているゲノムデータベースです。
1997.7.20.現在Ver.4.3が利用可能である。次のVer.4.4はテスト版として一般公開されず、Ver.4.5が一般公開される予定である。ここではVer.4.5α版の画面を示していくが、今後変更になる可能性があるので注意していただきたい。
UNIXマシンとしては、DEC-alpha、SGI-IRIX、DOS/V-Linux、SUN-Solaris、NEC-UP48などで動作確認されている。
UNIX版Ver4.1と同等の機能が提供されている。
現在β版が利用可能である。
各種生物のデータを作成しているグループがあり、それらをACEDBに読み込ませることにより利用可能である。線虫の場合およそ3カ月毎のアップデートが行われており、これをコピーしてきて利用する。1997.7.20.現在WS3シリーズの4-17が最新データであり、update.WS3.4-1.tar.Zからupdate.WS3.4-17.tar.Zまでを順に読み込ませればよい。
WWWブラウザを利用して
http://probe.nalusda.gov:8000/acedocs/allace.htmlに接続すると、利用できる。まもなくJava版もお目見えの予定である。ここのページからは、1997.7.20.現在、AatDB, Alfagenes, BeanGenes, ChlamyDB, CottonDB, GrainGenes, MaizeDB, RiceGenes, SolGenes, SorghumDB, SoyBase, TreeGenes, Mendel, Plant Variety Protection, EthnobotDB, FoodplantDB, MPNADB, PhytochemDB, AceDB, AgsDB, Human Chromosome 21, Human Chromosome X, MycDB, AaeDB, AboutDB, AgsDB, BadBase and BovBase, IGD, Metabolic Data, MycDB, SacchDB, Syndbを利用することができる。
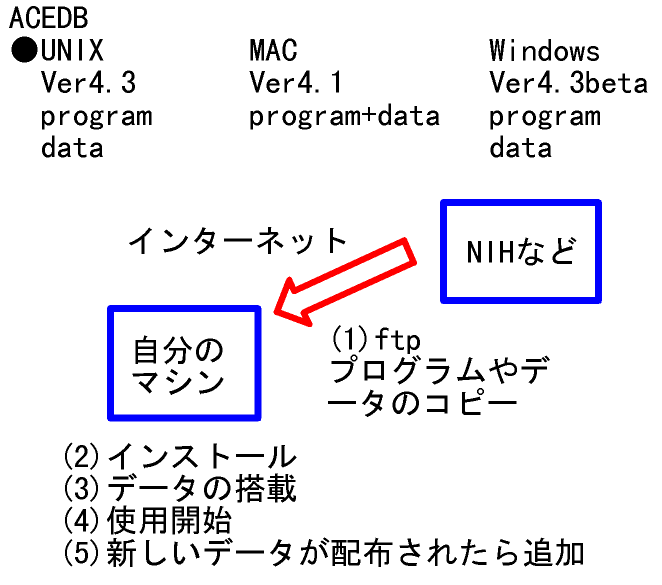
●ダウンロード
主な実行形式ファイルは、NIH(
UNIX、Windows版はデータが別になっているので、データもソフトとは別にダウンロードする。マッキントッシュ版は、自分でデータを読み込ませるのが難しく、各生物ともデータとプログラムを1つにパックしたファイルが配布されているので、それを利用する。
Windows版は正式版が出ていないので、手動でインストールするしかなく、よく分かった方以外は今しばらく待った方がよいように思われる。
マック版は圧縮されたファイル1つが提供されているので、ダブルクリックして解凍すればすぐに利用できる。ただし線虫の場合、データのアップデートが遅れる傾向にある。
UNIX版は、自分の利用するハードウェアに合ったソフト・データとともにINSTALLという名前のファイルを同時にダウンロードしてきて、すべてを同一ディレクトリ上に置く。その後source INSTALLと入力し、質問に答えていけばよい。最小構成の場合以下のようになる。>はUNIXプロンプトである。自分で入力するところは注釈で示した。その他はシステムからのメッセージである。機器構成によりメッセージの内容は変化するので、この通りでなくても心配しなくてよい。
--------------------------------------------------------------------
>
ls [入力]INSTALL* update.WS3.4-14.tar.Z update.WS3.4-5.tar.Z
bin.nec.4_5.tar.Z update.WS3.4-15.tar.Z update.WS3.4-6.tar.Z
update.WS3.4-1.tar.Z update.WS3.4-16.tar.Z update.WS3.4-7.tar.Z
update.WS3.4-10.tar.Z update.WS3.4-17.tar.Z update.WS3.4-8.tar.Z
update.WS3.4-11.tar.Z update.WS3.4-2.tar.Z update.WS3.4-9.tar.Z
update.WS3.4-12.tar.Z update.WS3.4-3.tar.Z
update.WS3.4-13.tar.Z update.WS3.4-4.tar.Z
>
source INSTALL [入力]
ACEDB installation script
sano will be known as the acedb-administrator
We are going to install the acedb system in the present directory:
/proj/exp/sano/test
This is your available disk space in this directory:
Filesystem 1024-blocks Used Available Capacity Mounted on
/dev/sd/c1t1d0sa 4010561 2999008 610496 83% /proj
The amount of space you need will depend on what data you are installing.
For the source code and binary, you need around 15 Mb.
Should we proceed? Please answer yes/no :
yes [入力]
Starting the installation
Restoring files from bin.nec.4_5.tar.Z
Restoring files from update.WS3.4-1.tar.Z
Restoring files from update.WS3.4-2.tar.Z
Restoring files from update.WS3.4-3.tar.Z
Restoring files from update.WS3.4-4.tar.Z
Restoring files from update.WS3.4-5.tar.Z
Restoring files from update.WS3.4-6.tar.Z
Restoring files from update.WS3.4-7.tar.Z
Restoring files from update.WS3.4-8.tar.Z
Restoring files from update.WS3.4-9.tar.Z
Restoring files from update.WS3.4-10.tar.Z
Restoring files from update.WS3.4-11.tar.Z
Restoring files from update.WS3.4-12.tar.Z
Restoring files from update.WS3.4-13.tar.Z
Restoring files from update.WS3.4-14.tar.Z
Restoring files from update.WS3.4-15.tar.Z
Restoring files from update.WS3.4-16.tar.Z
Restoring files from update.WS3.4-17.tar.Z
Hit return to proceed
[リターン入力]
I add sano to the password file
I have just created the files "acedb" and "textace" to run the
graphical and command-line versions of acedb respectively.
These commands should be placed in each user's path. To do this
either the users can add the following to the end of their .cshrc file:
set path = ($path /proj/exp/sano/test)
or preferably root should move them to /usr/local/bin by:
mv acedb textace /usr/local/bin
When you first run acedb you should choose the "Add Update" option
from the main menu to load the updates into the database.
If you need to recompile you must set two environment variables:
setenv ACEDB_SRC /proj/exp/sano/test
setenv ACEDB_MACHINE one of SUN_4, SGI_4 etc, see wmake/truemake
then type "make all". More details in the manual.
If users other than yourself need write access, add their
login names into wspec/passwd.wrm.
For more information :
a) Use the on-line help (help key or F1 or F10), while running acedb
b) Read the manuals in directory doc if you have it
c) Look at the WWW site: http://probe.nalusda.gov:8000/acedocs/.
d) Use e-mail : mieg@kaa.cnrs-mop.fr or rd@sanger.ac.uk
If you do not object, a report of the installation will now be mailed
to the developers of ACEDB. This lets us track installations, which
helps give you a better service.
Should we mail this report (default yes)?
yes [入力]
The installation is complete.
After testing the program, you can archive and remove the tar.Z files.
Please let us know if this installation script does not work.
Au revoir
>
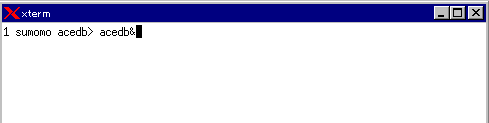
acedb& [入力] ACEDBが起動する。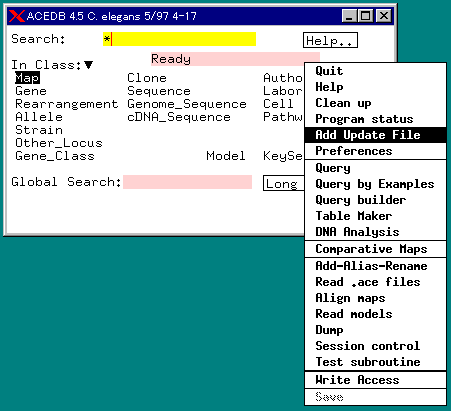
まだデータが入っていないので、次にデータのアップデートを行う。必要があればwspecディレクトリにあるpasswd.wrmファイルにインストールした人のアカウントを追加する。うまく作業が進んでいれば、自動的に入っているはずである。
メインウィンドウでマウスの右ボタンを押すとサブメニューが現れる。この中からAdd Update Fileを選ぶと現在使用されているデータバージョンが表示される。最初はデータが乗っていないと表示される。Next UpdateとAll Updatesの2つが選択肢として現れる。Next Updateでは1バージョンずつのデータアップデートが行え、All Updatesでは準備したすべてのバージョンを一気にアップデートできる。
これでACEDB本体が利用できるようになった。発現パターンデータを表示するためにはxvというシェアウェアをインストールする必要があり、プリントをするためにはポストスクリプトプリンタを用意する必要がある。
これでACEDBの全機能を利用できる環境が整った。メニューを選んでいくことでいろいろなデータにアクセスできるので、実際に動かしてみるのが手っ取り早い。
ここではUNIX版を例にとって説明するが、起動さえしてしまえばどのOSでも同様である。Windows,MAC版は、ともにプログラムバイナリをマウスで起動するだけである。
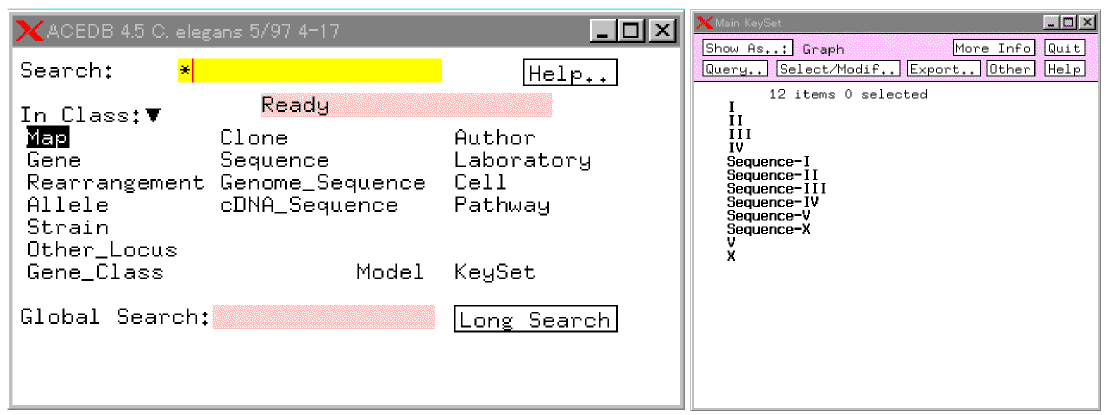
すると最初の画面として2つのウィンドウが現れる。たとえば次のようなものである。
1つ目の窓(下図左):ACEDBクラスウィンドウ(メインウィンドウ)
2つめの窓(下図右):メインキーセットウィンドウ
●マウスの使用
ワークステーションのマウスにはボタンが3つある。使い分けは以下の通り。
左ボタン:クラス、キー、またはボタンオプション選択
中ボタン:地図画面を左右(上下)に移動
右ボタン:サブメニューへのアクセス
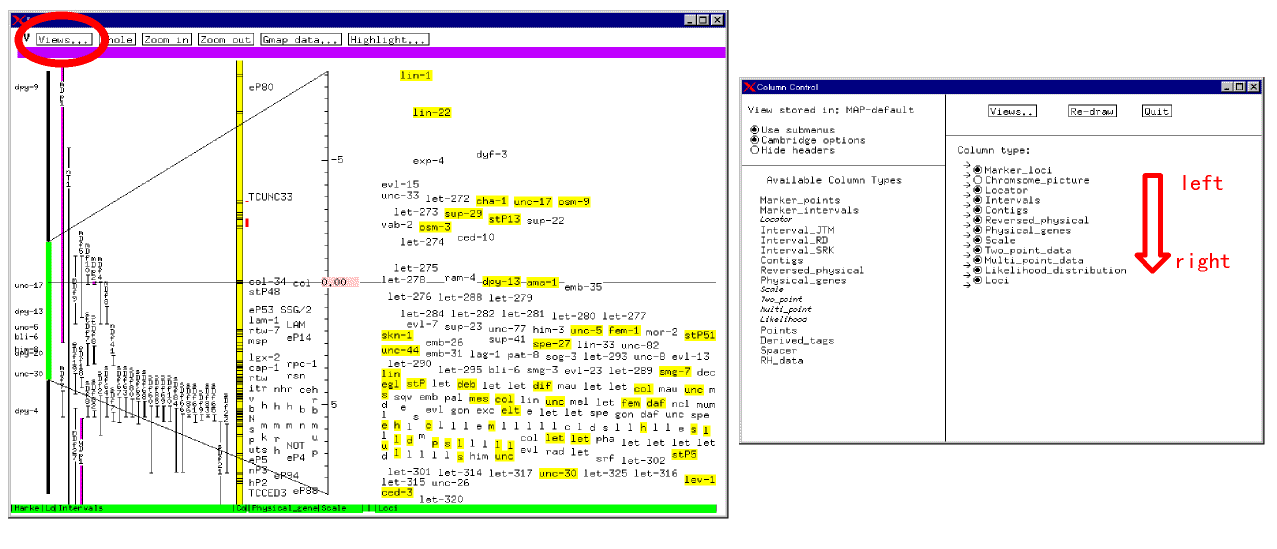
表示オプションを選ぶことができるので、画面の広さ等によって選択するとよい。
★各窓でマウスの右ボタンをクリックするとサブメニューが現れる。
■画面の一例
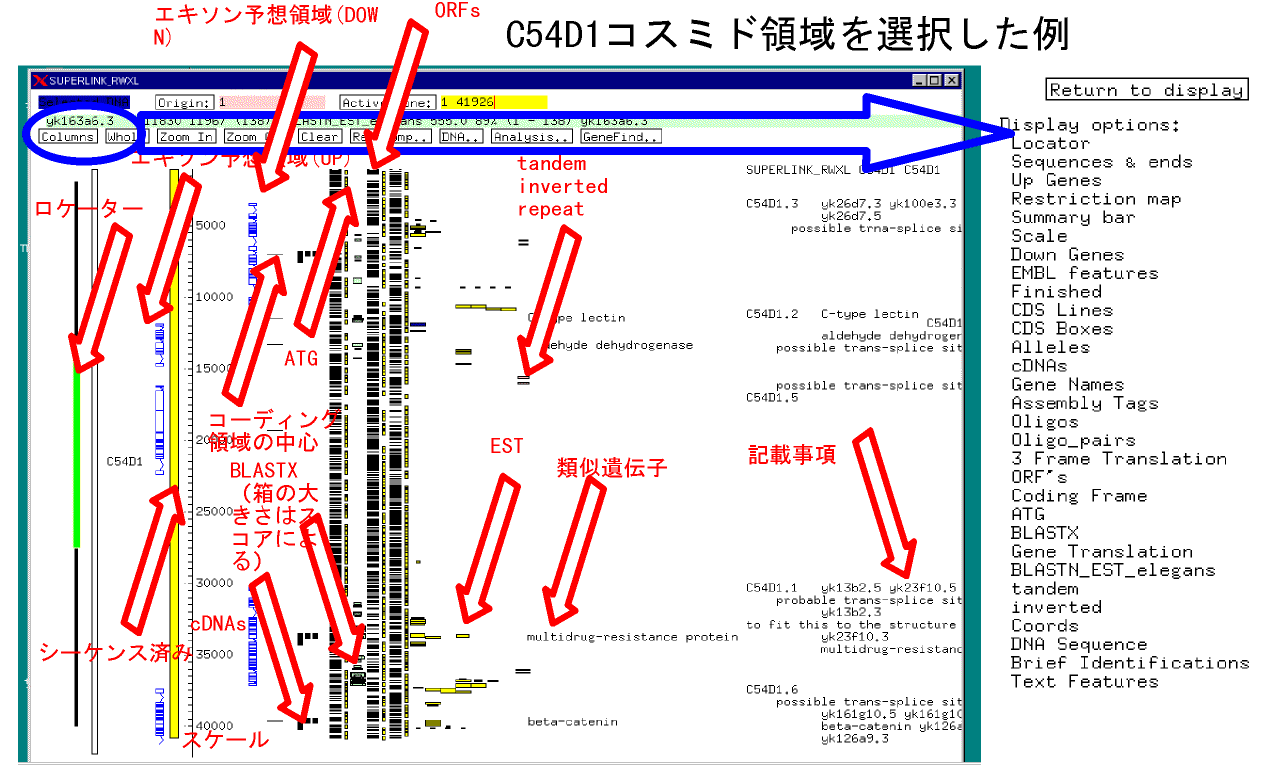
Columnsの中を見ることにより、それぞれのカラムが何を表示しているか分かる。他の画面についても同様である。
詳細については、拙著ACEDB日本語ガイドや文末に示すドキュメンテーションサイトを参考にしていただきたい。
■参考文献とサイト
●acedb -- A C. elegans Database: I, II, III. Users' Guide (on-line). by Richard Durbin and Jean Thierry-Mieg (1991-)